
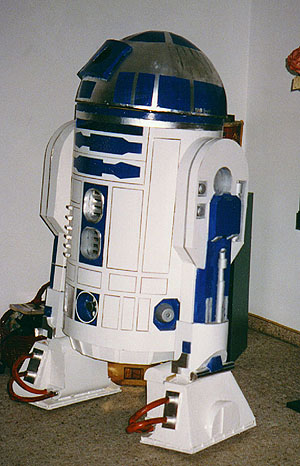
Just one thing: This R2-D2 is not perfect. But I think that I created a pretty nice model out of wood and aluminium for little money. You just have to know how to handle tools and how to improvice. After 9 months I finished this model. Of course I cannot give you here a full step-by-step procedure, but you may find some helpful hints.
Since this model was not perfect, I decided to build a second, better R2-D2. you may want to check out this site.
If you are not afraid of building your own R2-D2, you may find some helpful hints. The proportions of that model are not correct because I had no blueprints. .
First, you should get as many pictures of the original as possible. They are very helpful for the details. If you want to build it out of wood and aluminium, you need a drill, powersaw, knifes, scissors, ruler, paintbrushes, handsaw, hammer, screwdriver, and a hot-glue-gun. I went to a printshop to get some old aluminium printing-plates that can be used for details. Get some wooden sheets of 3-5 mm and start improvising. use rubbish you find like old paint-tins
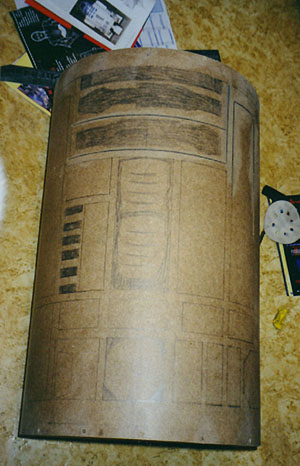
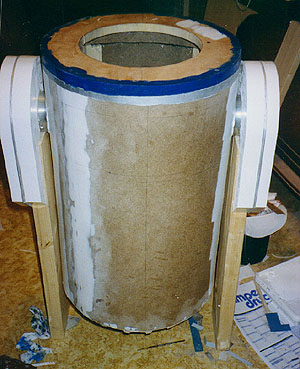
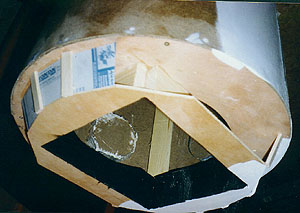
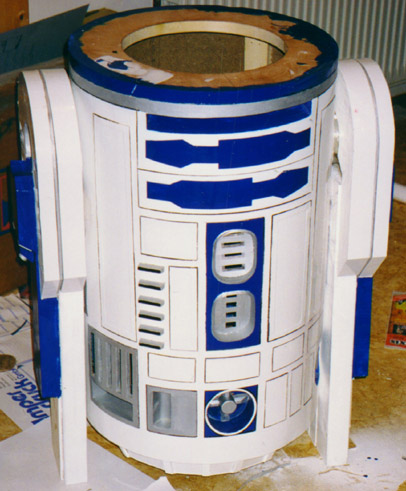
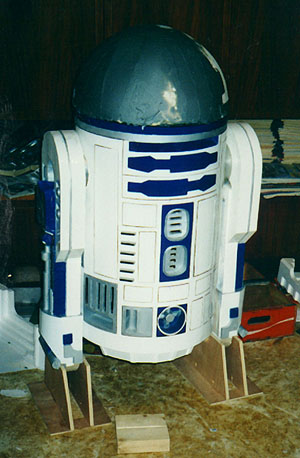
Thats for sure: The diameter is 46 cm. cut 2 circles of 45 cm diameter out of 1.5 cm wood and make a drum using 5 mm wood. Cut 2 holes of 30 cm diameter into the 2 46cm-discs so you will later be able to access the inside. I scetched the details onto the drum and etched them with a screwdriver or cut them out where necessary (see pictures). Next step: paint it white and mark the thin lines carefully with some black paint.
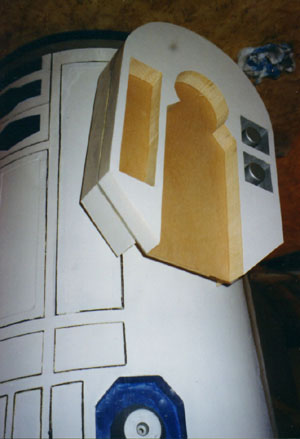
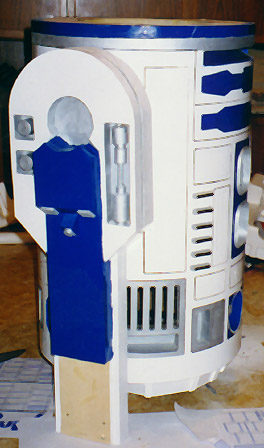
I made all details out of aluminium and thin wood. The grades were cut out and also the holes on the lower part. To improve the surface of the body, I covered it with white glossy foil. Details were painted with aluminium-paint from the model-makers shop. Pictures and a good imagination are very helpful for the details.
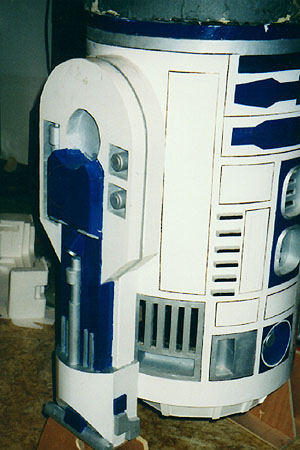
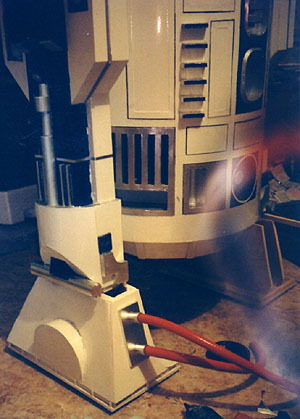
The shoulders of this R2 are way to big because i miscaluclated the dimensions. They are made of massive wood. The legs are also made of massive wood which I glued into the shoulders and secured them with screws. I made the details out of wood and aluminium and painted everything white and blue. The shoulder-ancles are two empty tins that I screwed onto the shoulders They were connected with 2 strong woodenstrips, so the legs can be moved. You need two more ancles where the feet are connected. Cut the lower ends of the feet into a round shape, drill a hole with 3 cm diameter to the lower end and use a longer 2,75 cm diameter wooden piece that connects to the feet. You may put some wheels underneath the feet but since my R2 was constructed without the third leg, there was no need for them.
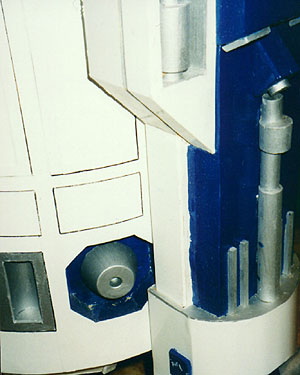
My construction is complicated but it has to be strong. I first built an inner frame that basically connects a lower platform (the underside) with the ancle thats connected to the legs. Around this frame, I constructed the outer chassis out of thinner wooden sheets because they don't carry the weight and are just for decoration. Like the rest of the R2, details are made of Aluminium and wood. Take 2 red rubber tubes, too.
That was my biggest problem. Where to get a head. it is almost impossible to find any kind of sphere with 46 cm diameter. Since I didn't want my R2 to stay headless, I cut out 2 half circles of abut 44 cm diameter and attached them vertically on a 44 cm diameter base. I formed a half-sphere with wiremesh and covered everything with fiberglass. After a many hours of sanding and filling dents, I painted the result silver and also painted the blue areas. I then constructed a turnable angle in the center to be able to move the head. This head may not be the best solution, but I wanted to keep this R2 cheap.
If your result almost resembles an R2-unit, you may make some final adjustments. I soon found out that I didn't like the aluminium-paint, so I purchased some aluminium-foil (self-glueing) and covered all parts with aluminium-color with it. The result was amazing.
After a while I decided to build another R2-unit. Check out my second R2-D2-page.